- HubPages»
- Technology»
- Computers & Software»
- Computer How-Tos & Tutorials
How to Enable File Sharing on Computers

and disable file sharing if preferred
File sharing in a business environment is a necessity. File sharing at home is more of a convenience but quickly becoming a necessity with the integrated web, portable devices, and streaming video.
In this article I'll cover Windows file sharing basics. I'll show you how to turn File sharing on or off, and some of the steps you need to follow to make it simple.
I'm going to start with the Windows 7 Operating System. I'll explain how to share a folder, the user groups available, and then how to access those file shares from within your network.
Perhaps you don't want file sharing turned on at all at home, I'll explain how to easily turn that off as well.
Got your energy drink in hand? lets get started!
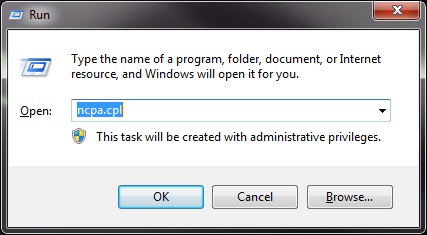
First of all, you need to make sure that "File Sharing" itself is turned on. In my hub "How To Check a Computer IP Address", I show you the shortcut ncpa.cpl .Hit the "Windows" key + "R" to open the run bar. Then type ncpa.cpl to get to your network adapters.
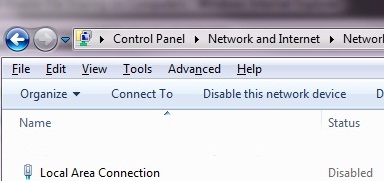
See where it says "Local Area Connection"? , right click that and select "properties". You want to make sure that "File and Printer Sharing for Microsoft Networks" is checked.
TIP - alternatively, unchecking this box is a quick and easy way to disable sharing from your computer
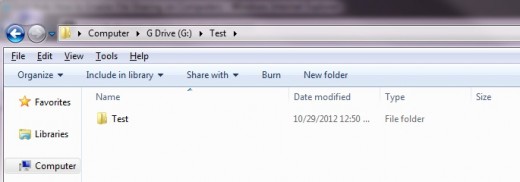
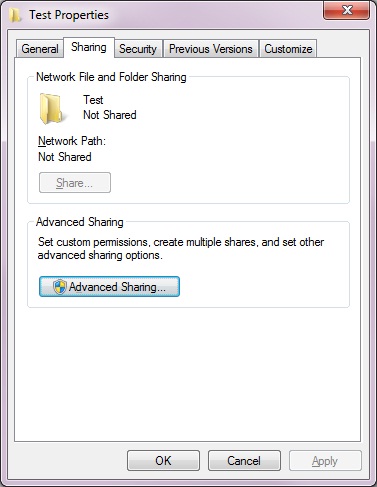
Now that we know that sharing is turned on, let's create a "test" folder and share it. Exit out of the control panel, and get back to the Windows Desktop. Double Click "Computer", or open windows explorer --- "Windows" key + "R", then type "explorer".
Pick the Drive\Folder of your choice and create a folder called "Test".
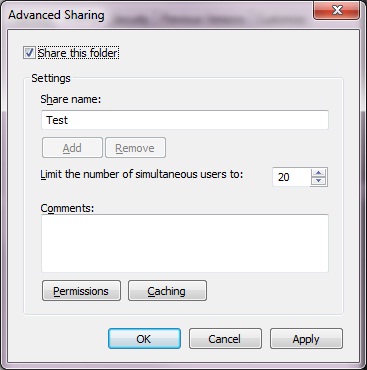
Right click the folder (make sure the folder is selected), and select "Share With", then "Advanced Sharing".
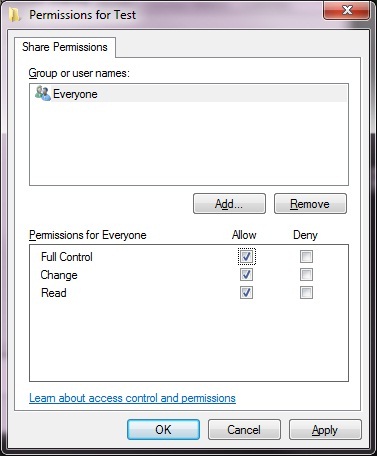
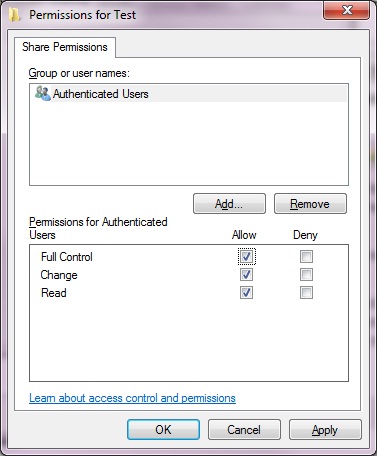
As you can see, the "everyone" group is already there, and the easiest solution is to give full control to this group. In a home environment, this might be fine. But in a business network, you may want to use different groups.
For example, I'll use "Authenticated Users" instead, or maybe even one person, such as yourself.
If you decide to add other people, be sure to then "remove the "everyone group".
TIP - In a "Workgroup" environment, your home for example, you must have the computers in the same named workgroup --- like "workgroup" for example. It's also easiest if you have the same user name and credentials on both machines you wish to share between.
To test your network share (and to see what else is shared on the PC) open the run bar ,
"Windows" key + "R", and type \\nameofyourcomputer.
For example --- \\testpc. This is a great way to see what's actually being shared on your PC.
You can do this from your own PC or from the other you wish to connect with.
A quick way to access shares on your business network would be to type \\nameofserver from the run bar. Want a real quick way to connect a shared printer? connect using the method I just showed you, right click and slect "connect". That's it!
TIP -- Do you have a really, really old PC laying around? (whitebox)? Why not try turning that Old PC into a file server?


