- HubPages»
- Technology»
- Computers & Software»
- Operating Systems»
- Windows
How to Copy Outlook Data to Windows 7


Believe it or not, I wasn't always a believer in backing up files. I used to say, "OH, it'll never happen to me".
Well, after a decade in IT, I can tell you without a doubt,
"It's not a matter of IF, it's a matter of WHEN".
Hard drives fail all the time. Data gets accidentally wiped and malware strikes. Laptops get dropped, stolen, or spilt on....essentially "Stuff" happens.
One of the most important files you can back up is your Outlook .pst file. Have you ever thought about how many contacts, important emails, and stored information you have in Outlook?
Backing up and Restoring your pst file takes only minutes and can save you countless hours of grief.
There are of course, many other reasons why one may want to transfer Outlook Data into Windows 7:
- an upgrade from Vista or XP
- a new machine, or a fresh Windows 7 Install
- a corrupted mailbox on the Exchange Server.... (yikes)
No matter what the reason, backing up, restoring or copying an Outlook Data file is fairly easy if you know how to do it!
In this article I'll show you how (Step by Step) copy your Outlook data to a Windows 7 machine using Outlook 2007. Grab that energy drink and let's get started!
TIP - .pst stands for Personal Storage Table , but is referred to as your Outlook "Personal File"


Backing up your Outlook Data
The first thing we need to do is grab a backup of the complete Outlook mailbox.
This is done by "exporting". The name of the file we will be exporting is a .pst file.
Just follow my pics below and we'll do it together step by step!
- Open up Outlook and select "File" ,"Import and Export"
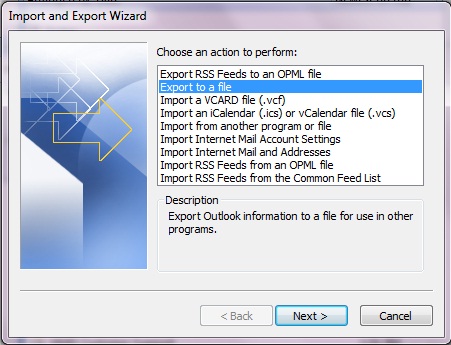
- Next, in the Import and Export Wizard, select "Export to a File"
- Then Select "Personal Folder File" (.pst).

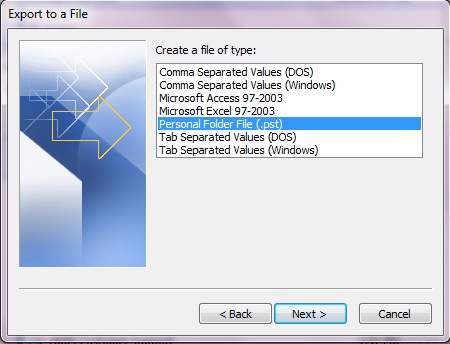

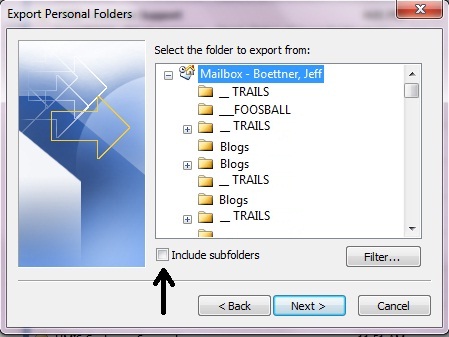
Next you'll see the "Export Personal Folders" Screen.
4. Make sure you highlight the top line -- "Mailbox -- Your Name" and most importantly, check the box that says "Include Subfolders".

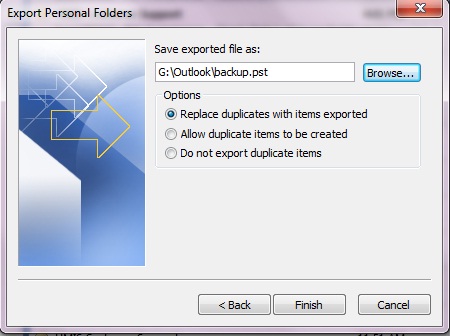
5. Next you'll see "Export Personal Folders".
"Browse" to a folder that you can easily locate, such as an external drive or your desktop. Since I'm copying data to my new Windows 7 PC, I chose to export right to my thumb drive in a folder called "Outlook".
Leave the default to "Replace duplicates with items exported" and click "Finish".
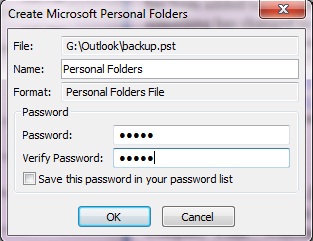
6. Finally you'll get to the "Create Microsoft Personal Folders" screen. You may wish to choose a password, then click OK and let Outlook go to work. In about 15-20 minutes you should have a pst copy of your entire Outlook Mailbox.
TIP - If you're familiar with Outlook, OR, your IT guy has set you up with extra Outlook Data files (for local storage, or more email accounts such as gmail, or hotmail), then you may wish to backup those files as well. Anything thats indexed to the very far left, and isnt included in the "Mailbox" tree must be backed up the same way.


Copying your Outlook Data (pst) to your Windows 7 PC
Restoring your pst file is as simple as it was to back up.
- Open Outlook, and select "File", "Import and Export"
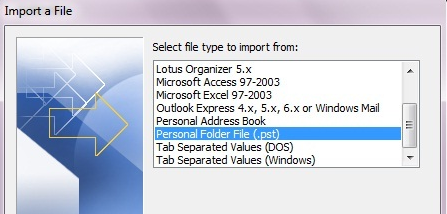
- This time, scroll down and select "Import"
- In the Import a File Window, select "Personal Folder File" (.pst)
- In the "File to Import" Window, Browse to the folder where you saved your .pst
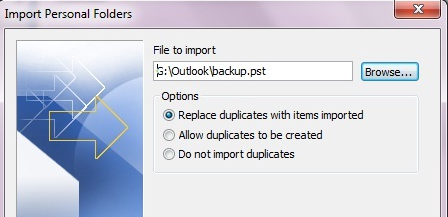
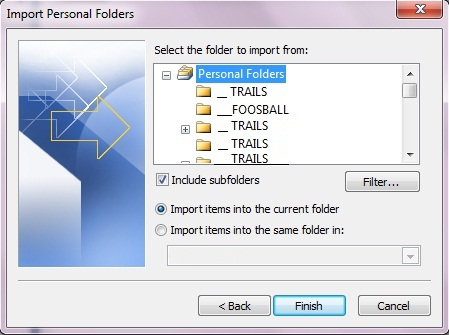

In the last Window, "Import Personal Folders", (look familiar?), Highlight the Folder that says "Personal Folders" (The default name, or whatever you may have called it when you saved it for the export". Make Sure you select "Include Subfolders".
*** TIP - If you have an Exchange Server, and this is a new PC or a fresh install, set up your Exchange account first. Then select "Import Items into the same folder in: (your mailbox) from the second radio button.
This will avoid creating that annoying "Personal Folders" folder above your mailbox!
Click "Finish", sit back and relax, and all of your Outlook data will appear within minutes.

~Credits~
- All Screenshots taken by Jeff Boettner (howlermunkey)
- The munkeywindowsborder were also created by Jeff Boettner (howlermunkey)
Related

Solution for Windows 7 Stuck on Welcome Screen
 in Windows 7")
How to Install Picture Motion Browser (PMB) in Windows 7

How to Activate Windows 7 & 8 for Free Using Microsoft and Loader/Activator Tools

How to Speed up Windows 7

Variety is the Spice of Desktops: Changing Windows 7 Wallpaper Automatically and Regularly